As we age, maintaining flexibility, balance, and strength becomes increasingly important for overall health and independence.
However, traditional forms of exercise can sometimes be challenging or risky for seniors.
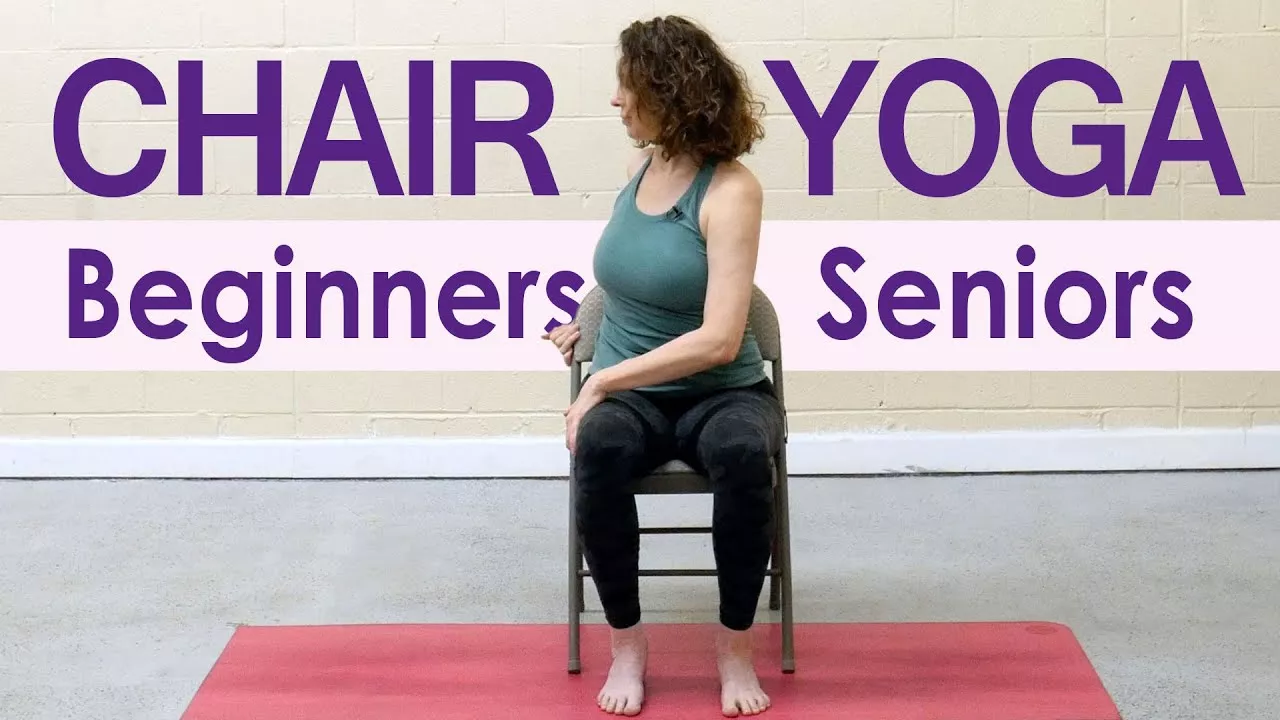
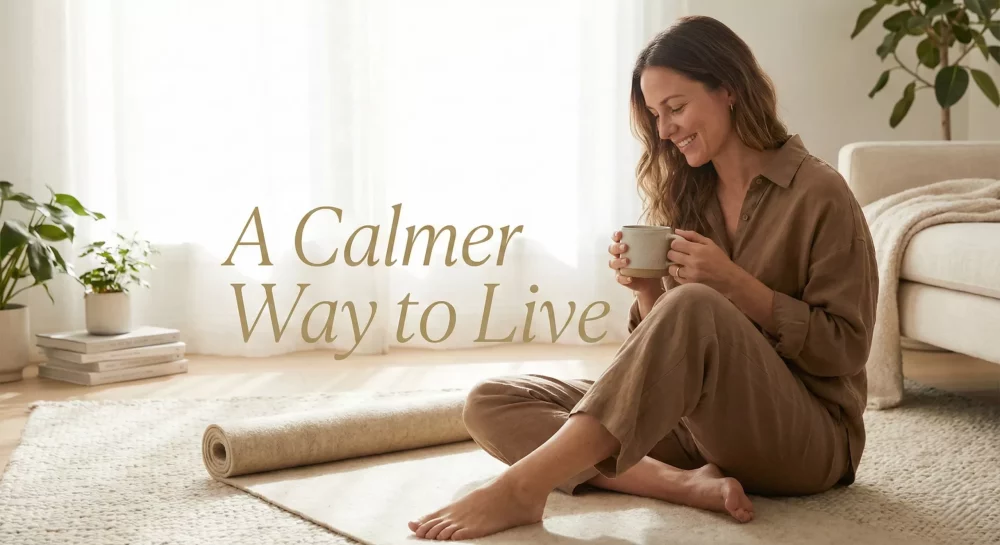
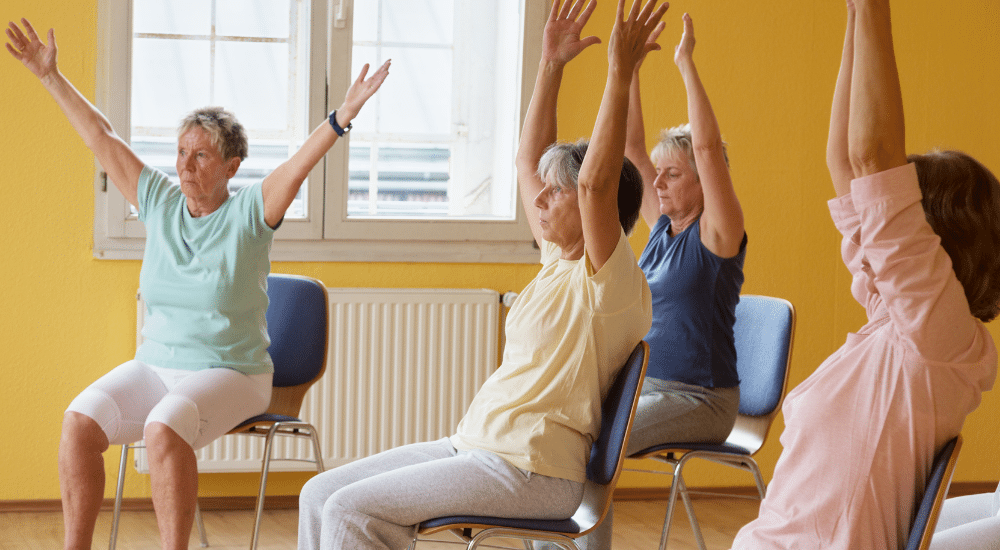
Chair yoga offers a gentle alternative that adapts traditional yoga poses for practice while seated or using a chair for support.
This approach makes yoga accessible to individuals with limited mobility or those who find standard yoga classes intimidating.
Benefits of Chair Yoga
- Improved Flexibility: Regular stretching helps loosen tight muscles and increase the range of motion in joints, making daily activities easier.
- Enhanced Balance and Stability: Gentle poses strengthen core muscles and improve proprioception, reducing the risk of falls.
- Increased Strength: Using one’s own body weight in poses helps build muscle strength without the need for equipment.
- Better Breathing: Focused breathing exercises enhance lung capacity and promote relaxation.
- Stress Reduction: Mindfulness and meditation components help lower anxiety and improve mental clarity.
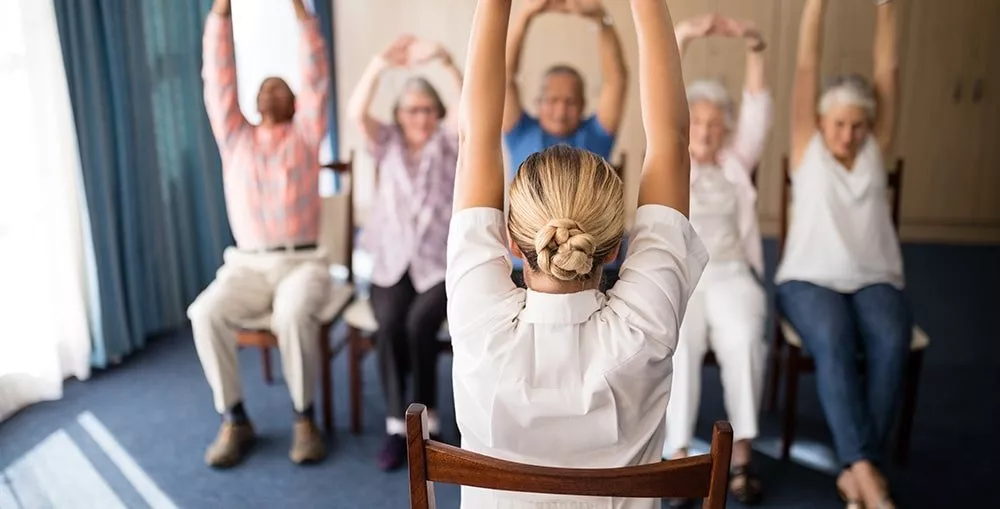
- Social Interaction: Group classes provide a sense of community and can alleviate feelings of isolation.
Getting Started with Chair Yoga: A Step-by-Step Guide to Begin Your Journey
Chair yoga is an accessible and gentle form of exercise that provides seniors with the opportunity to reap the benefits of yoga without putting unnecessary strain on the body.
For those new to the practice, understanding how to get started safely and effectively is key.
Below, we’ll walk through a comprehensive guide to help seniors prepare for their chair yoga journey, ensuring a comfortable, enjoyable, and beneficial experience.
Step 1: Consult Your Healthcare Provider
Before beginning any new exercise regimen, it is essential to consult your healthcare provider, especially if you have chronic conditions, joint problems, or limited mobility.
They can assess your physical readiness for chair yoga and may provide recommendations for modifications or precautions based on your health needs.
Some questions to discuss with your doctor might include:
- Are there specific movements or stretches I should avoid?
- How often should I practice chair yoga for optimal results?
- Are there any warning signs (like dizziness or shortness of breath) I should watch for during exercise?
Your doctor can also advise you on any potential risks and ensure that chair yoga is a safe addition to your routine.
Step 2: Select the Right Class or Resource
Finding the right class or learning resource is critical to having a positive experience. Here are some tips to help you choose the best option:
1. Look for Senior-Focused Chair Yoga Classes:
Many yoga studios, community centers, and senior organizations offer chair yoga classes specifically designed for older adults.
These classes often prioritize safety and cater to varying mobility levels.
2. Choose Qualified Instructors:
A trained and certified yoga instructor with experience teaching chair yoga for seniors is ideal.
They will understand the unique needs of older adults and can provide guidance for modifying poses.
3. Explore Online Options:
If in-person classes are not available or preferred, there are excellent online resources, including videos and tutorials, designed for chair yoga beginners.
Look for reputable sources, such as certified yoga instructors or senior health organizations.
4. Check Accessibility:
Make sure the location of the class is accessible, and the environment feels welcoming.
It’s also helpful to ensure that classes provide proper seating arrangements with sturdy, comfortable chairs.
Step 3: Gather the Necessary Equipment
While chair yoga doesn’t require expensive gear, having the right setup ensures a comfortable and safe practice. Here’s what you’ll need:
A Sturdy Chair:
- Choose a chair with a flat, firm seat (not overly cushioned) for stability.
- Ensure it has no wheels or slippery surfaces to prevent movement during poses.
- If possible, use a chair without armrests to allow greater freedom of movement.
Non-Slip Surface: Practice on a non-slippery floor or place a yoga mat under the chair to prevent sliding.
Comfortable Clothing:
- Wear loose, breathable clothing that allows you to move freely.
- Avoid restrictive clothing or accessories that could impede your movement.
Optional Props:
- Yoga blocks: These can provide additional support during certain poses.
- A small pillow: Use it to add comfort to the seat if needed.
- Resistance bands: Helpful for gentle strength-building exercises.
Step 4: Create a Calm and Safe Environment
Setting the right atmosphere can significantly enhance your chair yoga experience. Here’s how to prepare your space:
- Find a Quiet Area:
Select a space free of distractions where you can focus on your practice without interruption. - Ensure Ample Space:
Make sure there’s enough room around the chair to stretch your arms and legs freely without hitting furniture or walls. - Good Lighting and Ventilation:
Natural light is ideal, but any well-lit and ventilated area will work. Fresh air can make the session more enjoyable. - Use Music or Aromatherapy (Optional):
Some people enjoy practicing yoga with soothing background music or calming scents like lavender to promote relaxation.
Step 5: Learn the Basics Before You Begin
For beginners, it’s helpful to understand a few foundational principles of chair yoga.
Familiarizing yourself with these basics will make your practice more effective and enjoyable:
1. Proper Posture:
- Sit tall in the chair with your feet flat on the floor, roughly hip-width apart.
- Keep your spine elongated and shoulders relaxed.
- Engage your core muscles gently to support your posture.
2. Breathing Techniques:
- Deep, steady breathing is a cornerstone of yoga. Inhale deeply through your nose, allowing your abdomen to rise, and exhale slowly through your nose or mouth.
- Focused breathing enhances relaxation and oxygen flow to your muscles.
3. Move Slowly and Mindfully:
Yoga isn’t about speed or intensity—it’s about mindful movement. Perform each pose slowly and with control to avoid injury.
4. Start Small:
Begin with simple poses and shorter sessions (5–10 minutes). Gradually increase the duration and intensity of your practice as your confidence and comfort level grow.
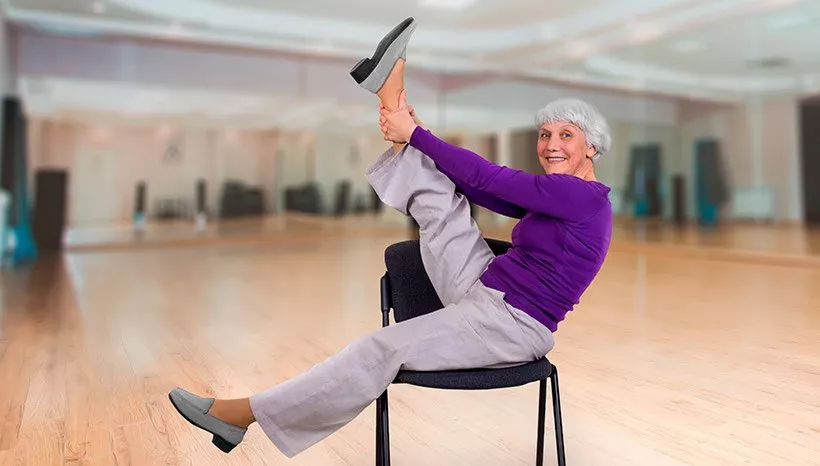
Step 6: Try Beginner-Friendly Chair Yoga Poses
Starting with beginner-friendly poses will help you ease into the practice and build a foundation of strength, flexibility, and balance. Here are a few poses to start with:
1. Seated Cat-Cow Stretch:
- Sit up straight and place your hands on your knees.
- On an inhale, arch your back slightly, lifting your chest and looking up (Cow Pose).
- On an exhale, round your spine, tucking your chin to your chest (Cat Pose).
- Repeat for 5–8 breaths to improve spinal flexibility.
2. Seated Side Stretch:
- Sit tall and rest your left hand on the chair seat.
- On an inhale, raise your right arm overhead and gently lean to the left.
- Hold for a few breaths, then switch sides.
3. Ankle Circles:
- Lift one foot slightly off the floor and rotate the ankle in slow, circular motions.
- Reverse the direction, then switch legs.
4. Leg Extensions:
- Sit with your back straight and feet flat on the floor.
- Slowly extend one leg forward, straightening the knee.
- Lower the leg back down and repeat with the other side.
Step 7: Practice Consistently
Consistency is key to experiencing the benefits of chair yoga. Aim to practice at least 2–3 times per week, or daily if possible.
Even short sessions of 10–15 minutes can make a difference over time. Regular practice improves flexibility, strength, and mental well-being.
Step 8: Stay Patient and Positive
Starting a new routine takes time, so be patient with yourself. Yoga is not about perfection but progress.
Celebrate small victories, like being able to stretch a little further or feeling more relaxed after a session.
With time, you’ll notice improvements in your physical and mental health.
Step 9: Join a Community (Optional)
Chair yoga classes can provide more than physical benefits—they’re also an opportunity to connect with others.
Socializing with peers in a group setting fosters a sense of community and can boost emotional well-being.
Step 10: Keep Track of Your Progress
As you continue with chair yoga, consider keeping a journal to track your progress. Note any improvements in flexibility, strength, balance, or mood.
Reflecting on your growth can motivate you to stay committed to your practice.
Starting chair yoga is a rewarding journey that promotes physical health, mental clarity, and emotional peace.
By taking the time to prepare, find the right resources, and create a safe environment, seniors can enjoy a fulfilling and accessible way to stay active.
With regular practice, chair yoga can become a cornerstone of a healthy, balanced lifestyle for older adults.
Simple Chair Yoga Poses: Detailed Guide for Safe and Effective Practice
Chair yoga is designed to make traditional yoga more accessible, especially for individuals with limited mobility or balance concerns.
The following chair yoga poses are beginner-friendly, offering a combination of stretching, strengthening, and relaxation.
By incorporating these poses into your routine, you can enhance flexibility, improve posture, and reduce stress.
Below, we provide a detailed breakdown of each pose, including step-by-step instructions, modifications, and the specific benefits they offer.
1. Seated Mountain Pose (Tadasana)
This foundational pose helps establish proper alignment, promotes mindfulness, and serves as a starting point for many other poses.
How to Perform:
- Sit tall on the chair with your feet flat on the floor, hip-width apart.
- Position your knees directly above your ankles.
- Lengthen your spine, sitting up straight, and engage your core muscles.
- Place your hands on your thighs with your palms facing down or resting at your sides.
- Relax your shoulders away from your ears, and gently lift the crown of your head toward the ceiling.
- Take slow, deep breaths, focusing on your posture and stability.
Modifications:
- If your feet don’t comfortably reach the floor, place a yoga block or a folded blanket under them for support.
- For added challenge, lift your arms overhead, palms facing each other, to engage your shoulders.
Benefits:
- Improves posture and body awareness.
- Strengthens the core and stabilizing muscles.
- Helps calm the mind and focus on the breath.
2. Overhead Stretch (Urdhva Hastasana)
This gentle stretch lengthens the spine, opens the shoulders, and improves flexibility in the upper body.
How to Perform:
- Begin in Seated Mountain Pose, sitting upright with feet flat on the floor.
- On an inhale, raise both arms overhead, reaching toward the ceiling.
- Keep your palms facing each other and your shoulders relaxed.
- Stretch upward through your fingertips while keeping your lower back and hips grounded on the chair.
- Hold the stretch for 3–5 breaths, feeling the elongation in your spine and sides.
- Exhale and slowly bring your arms back down to your sides.
Modifications:
- If lifting both arms feels challenging, raise one arm at a time while keeping the opposite hand resting on your thigh.
- If you have shoulder issues, keep your arms slightly bent or lower them to a comfortable position.
Benefits:
- Stretches the spine, shoulders, and arms.
- Promotes better posture by counteracting slouching.
- Increases lung capacity through deep breathing.
3. Seated Cat-Cow Stretch (Marjaryasana-Bitilasana)
This dynamic pose improves spinal flexibility and gently massages the back muscles, making it ideal for relieving tension.
How to Perform:
- Sit on the edge of the chair with your feet flat on the floor.
- Place your hands on your knees or thighs for support.
- Cow Pose (Inhale): Arch your back slightly, lift your chest forward, and look upward. Allow your shoulders to roll back and down.
- Cat Pose (Exhale): Round your spine, tuck your chin to your chest, and pull your belly button toward your spine.
- Repeat this sequence for 5–8 breaths, moving slowly and smoothly between the two poses.
Modifications:
- Keep your movements small and gentle if you have any spinal or neck issues.
- If looking up during Cow Pose is uncomfortable, keep your gaze forward instead.
Benefits:
- Increases flexibility in the spine.
- Relieves tension in the back, neck, and shoulders.
- Promotes circulation and reduces stiffness.
4. Seated Side Stretch (Parsva Urdhva Hastasana)
This pose stretches the sides of the body, improving flexibility and relieving tension in the obliques and lower back.
How to Perform:
- Sit tall on the chair with feet flat on the floor and hands resting on your thighs.
- Inhale and raise your right arm overhead, keeping your left hand on the chair for support.
- Exhale and gently lean to the left, feeling a stretch along the right side of your torso.
- Keep your hips grounded and avoid collapsing forward.
- Hold the stretch for 3–5 breaths, then return to the starting position.
- Repeat on the other side.
Modifications:
- If raising your arm overhead is uncomfortable, rest your hand on your hip or shoulder while leaning.
- Use a cushion for added support if needed.
Benefits:
- Stretches the intercostal muscles, obliques, and lower back.
- Improves flexibility and spinal mobility.
- Reduces stiffness and tension in the sides of the body.
5. Seated Forward Bend (Paschimottanasana)
This pose gently stretches the back, hamstrings, and hips while calming the mind.
How to Perform:
- Sit near the edge of the chair with your feet flat on the floor and hip-width apart.
- Inhale to lengthen your spine, sitting tall.
- Exhale and slowly hinge forward from your hips, bringing your chest toward your thighs.
- Allow your arms to dangle toward the floor, or rest your hands on your thighs, shins, or a yoga block.
- Let your head relax, keeping your neck in line with your spine.
- Hold the pose for 3–5 breaths, then slowly roll back up to a seated position.
Modifications:
- If you have tight hamstrings, keep your knees slightly bent to reduce strain.
- Avoid rounding your back excessively—focus on hinging from the hips.
Benefits:
- Stretches the lower back, hamstrings, and hips.
- Eases tension and promotes relaxation.
- Stimulates blood flow to the brain, improving focus.
6. Seated Twist (Ardha Matsyendrasana Variation)
Twists are excellent for improving spinal mobility and stimulating digestion.
How to Perform:
- Sit tall on the chair with feet flat on the floor and knees hip-width apart.
- Place your right hand on the outside of your left thigh.
- Place your left hand on the back of the chair for support.
- Inhale to lengthen your spine, sitting as tall as possible.
- Exhale and gently twist your torso to the left, looking over your left shoulder.
- Hold the twist for 3–5 breaths, then slowly return to the center.
- Repeat on the opposite side.
Modifications:
- Keep the twist small if you have any spinal or abdominal discomfort.
- Avoid forcing the twist—move within your range of motion.
Benefits:
- Enhances spinal rotation and flexibility.
- Massages the abdominal organs, aiding digestion.
- Relieves stiffness in the back and shoulders.
7. Ankle Rolls
Ankle rolls improve circulation and mobility in the lower legs, making this pose ideal for seniors with joint stiffness or poor circulation.
How to Perform:
- Sit comfortably in the chair with your back straight and feet flat on the floor.
- Lift your right foot slightly off the floor and extend your leg forward.
- Slowly rotate your ankle in a circular motion, completing 5–10 circles in one direction.
- Reverse the direction for another 5–10 circles.
- Lower your foot back to the floor and repeat with the other leg.
Modifications:
- If lifting your leg feels difficult, keep your toes on the floor and perform the rotation.
Benefits:
- Improves ankle mobility and joint health.
- Increases circulation to the feet and lower legs.
- Reduces stiffness and swelling.
8. Leg Extensions
This simple movement strengthens the quadriceps and promotes blood flow to the lower body.
How to Perform:
- Sit tall in the chair with your hands resting on your thighs.
- Extend your right leg straight out, keeping your foot flexed (toes pointing upward).
- Hold the position for 2–3 breaths, then lower your leg back down.
- Repeat on the left side, alternating legs for 5–8 repetitions on each side.
Modifications:
- Place your hands on the sides of the chair for additional support.
- Perform smaller extensions if full leg straightening is challenging.
Benefits:
- Strengthens the quadriceps and knees.
- Improves circulation in the lower body.
- Supports better balance and mobility.
Tips for a Successful Practice
- Listen to Your Body: Move within a comfortable range of motion and avoid any poses that cause pain.
- Maintain Steady Breathing: Inhale and exhale slowly to enhance relaxation and oxygen flow.
- Stay Hydrated: Drink water before and after the session to keep muscles supple.
- Practice Regularly: Consistency enhances the benefits and aids in progress.
Conclusion
Chair yoga is an excellent way for seniors to engage in physical activity that is both safe and effective.
It promotes physical health while also offering mental and emotional benefits.
Whether in a group setting or at home, chair yoga can be a valuable addition to a senior’s wellness routine.